Over the next few weeks, we’ll be bringing you the best of our Tutorial Tuesday series, resurfacing the most popular and useful tips from past Tuesdays. Enjoy!
Why create just one design when you can create infinitely many? Instead of designing a ring in just one size, you could use parametric design to control the ring size or the surface pattern, effectively creating many designs within one. Parameters also enable you to create algorithmic, generative designs with amazing complexity.
A good entry point to parametric design is OpenSCAD; you can read more about it in our previous article Tutorial Tuesday 4: Using OpenSCAD to Design With Code. When you’re ready to step into more complex, even organic-looking parametric design, then it’s time to look at Grasshopper. Grasshopper is a plug-in that comes standard with the powerful 3D modeling software Rhino.
To give Grasshopper a try, you must first download a free trial of Rhino for Windows, or download the Work in Progress version of Rhino for Mac. Start up Rhino and type “grasshopper” into the Rhino command line; Grasshopper will open in a window that overlays your Rhino workspace. Creating designs in Grasshopper involves placing visual code elements and connecting them with input/output “wires.” The resulting forms can be modified with parametric sliders and then ultimately “baked” into Rhino when you find a desirable set of parameters.
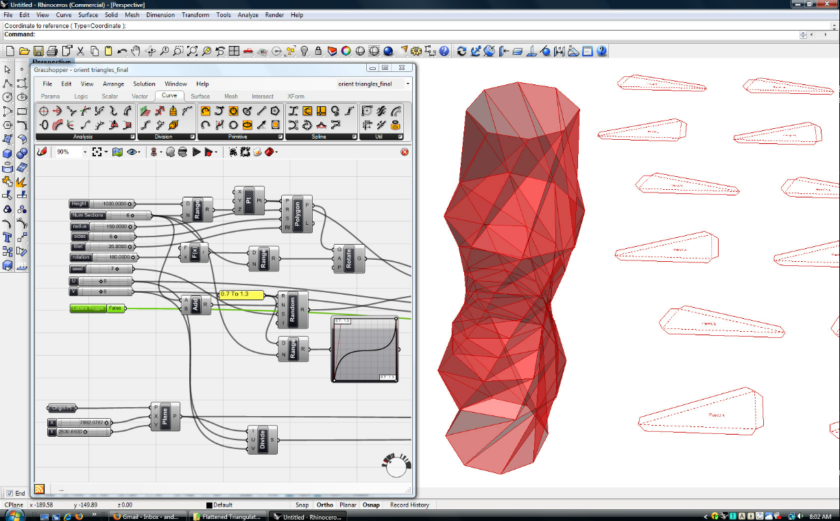
It looks complicated, but it isn’t as hard as it seems; once you get the hang of it, it is easier than writing text-based code. Here’s what a typical Grasshopper design-in-progress might look like:
Getting Started with Grasshopper
For first steps, follow through the Grasshopper Getting Started videos by David Rutten. These videos will walk you through creating your first Grasshopper definition, working with sliders, and using the interface effectively.
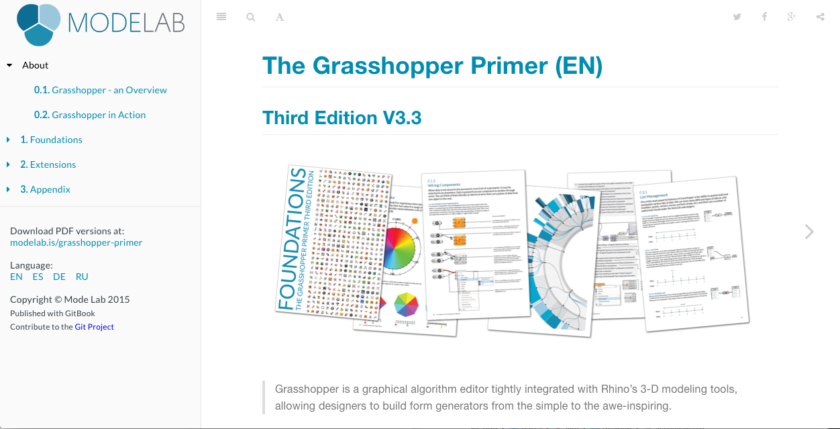
Once you understand the basics of interacting with Grasshopper, move on to Mode Lab’s fantastic Grasshopper Primer. This primer is a printable online resource that can be used as the basis of a short but powerful first course on Grasshopper. This foundations course covers not only the basics but also more advanced key topics such as data trees, algorithms, and mesh geometry.
For more advanced tips, walthroughs, and examples, head back to the main Grasshopper site to check out their list of video tutorials:
And finally, you can order a printed reference for Grasshopper: Dave Bachman‘s excellent new book Grasshopper: Visual Scripting for Rhinoceros 3D. The first half of this book is a thorough introduction to Grasshopper, including very detailed breakdowns of Grasshopper scripts for key example designs. The second half is an extensive Component Reference, which is handy to flip through to get new ideas or a birds-eye view of available options.
A simple Grasshopper design
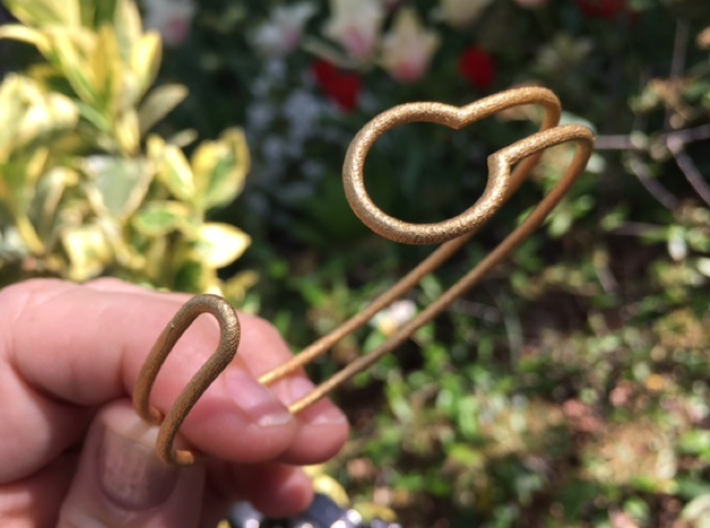
So what can you design with Grasshopper? Anything from simple forms to complex algorithmic designs. Let’s start with a very simple example, our own Witness Bracelet from the geekhaus shop:
This bracelet was designed by sketching out the Witness path shape on a flat plane, extruding around that sketch with a tube, then wrapping the resulting form around an elliptical cylinder whose dimensions are determined by parameters that represent wrist width and height. The Grasshopper code for those actions is the mysterious mess of wiring shown below:

Of course, we could have created this simple bracelet in a much simpler, nonparametric way, but using Grasshopper enables us to move sliders to control wrist size measurements, path definition, and other features. This means that the Grasshopper code can create millions of variations on our design, and we decided to print one of them.
Parametric Power
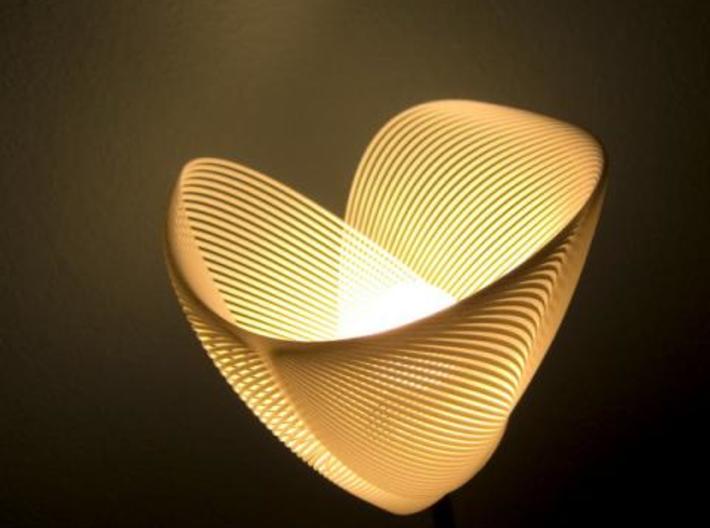
Designers who leverage the power of parametric design don’t create just one model at a time, they create whole families of models with adjustable parameters. For example, consider the stunning Clothoid.A Lamp by Alienology, one beautiful form chosen from a huge array of possible designs created with parametric lofted splines:
Using the same Grasshopper code and modifying certain parameters, Alienology also created this very different Clothoid.B Lamp:
As another example, consider the work done by Responsive Design Studio in Germany. Using Grasshopper, they created a parametric ring design that can be customized to finger size, width, pattern, and other preferences.

Have you been creating parametric designs with Grasshopper or other modeling software? Tell us about it in the comments for a chance to be featured in future Tutorial Tuesday posts.
Or, if you’ve got questions about Grasshopper, leave a comment so that someone in the Shapeways community can help you get started.


Hi, don’t forget that one of the things that makes Grasshopper great is its community, where many users help altruistically to solve questions from others and where third-party developers share their plugins to extend the functionality of this magic tool. There are very few communities as incredible as this out there.
For jewelry designers, creating parametric jewellery in GH is now very easy thanks to Peacock, a free algorithmic jewellery software for Grasshopper 🙂
http://www.food4rhino.com/app/peacock
I’m excited to let you know that my shop was featured this week on Etsy (https://blog.etsy.com/en/featured-shop-kate-szabone-jewellery/?ref=hp). The interview touched on 3D printing and parametric design to create custom rings in real time editing and customization. I have launched a ‘sister’ site, ksjewellery.ca, that will sell jewellery that clients can customize and produce through Shapeways. They can then customize the ring on my site and then press a button to order directly through Shapeways. Currently, there are a couple of designs like my Vine Ring Maker (http://ksjewellery.ca/vine-ring-maker.html) and the Wreath Ring Maker (http://ksjewellery.ca/wreath-ring-maker.html).
Thanks so much!
Kate
kateszabone.com
ksjewellery.com
shapeways.com/shops/ksjewellery
kateszabone.etsy.com
This is awesome!! Thanks for sharing!!!
Grasshopper is indeed a unique tool for designing so-called organic objects. But it also does well with more standard shapes. I researched 3D design software quite extensively before I made my very first 3D print and after more than 150 designs I have not been disappointed. Here are a couple of points about Grasshopper that should be helpful for interested people:
1. Grasshopper is an add-on component for Rhino3D. The current production version of Rhino is Ver. 5.xx (I’m not real sure what the complete number is), and for this version Grasshopper is NOT a built-in component, but has to be downloaded and installed separately. Grasshopper itself is free, but Rhino is not. However, Rhino does give a 90 day free trial.
2. Very soon now (perhaps in several weeks) the next version of Rhino will be released. It will be called Rhino 6, and will include an updated version of Grasshopper along with a couple of very popular Grasshopper add-ons. This upcoming version of Rhino is currently called Rhino6 WIP (Work In Progress) and can downloaded with Grashooper etc.fromthe link given in the article.
3. Like all 3D design software, the Grasshopper/Rhino combination has some quirks and bugs that manifest themselves as unprintable (meaning unslicable) STL files. Fortunately the Netfabb people have recently released a free online service that fixes problematic STL files. As a matter of course I run all my STL files through this service before trying to slice them. Here’s the link for the service: https://service.netfabb.com/login.php.
My 3D Printing blog as several pages with info about all this, plus a link that shows all the parts I have designed and published so far: http://www.birkbinnard.com/blog