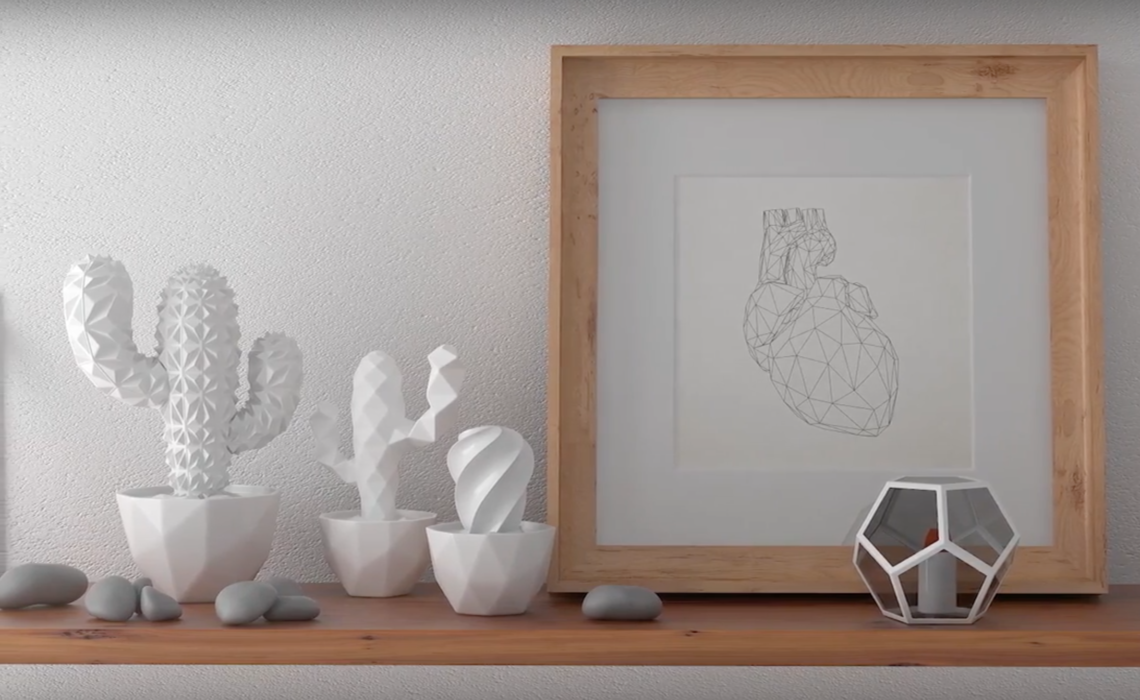
Coachella is almost here! Beyond being a place for incredible music, it’s the festival that seems to have single-handedly started the desert chic interior design trend. So we’re getting in the spirit with some easy 3D printed home decor tutorials that will help you bring a twist on the desert look to your space — and introduce you to a design software that we think you’ll love: Vectary.
It’s part of our tutorial series on Vectary, a design tool that’s free and 100% online. Check out this video for an introduction, and read on to learn how to make your own contemporary cacti.
Here are three simple tutorials that will allow you to practice the basic functions of free online 3D modeling tool Vectary while creating monochrome and minimalist succulents that look gorgeous when printed.
Let’s start with customizing a ready-made template. The possibility to customize and personalize a ready-made model is one of Vectary’s greatest perks, providing you with endless sources of inspiration that you can easily make your own.
already have a design? print it now
Twirly Shape
Creating a spiral shape is a great exercise to get comfortable with the basic Marquee tool (for selection) and Rotate tool from the Gizmo, which is what Vectary calls its transformation tool. The Gizmo is a collection of arrows, curves, and cubes.
Open Vectary template of a small succulent. Click on the Customize button to open the editor.

Turn off Smoothing by clicking on the icon in the left toolbar.
Now you see the template in low poly geometry. Click on the arrow next to Snapping to expand the menu, and toggle Snap Angle to 15 degrees. This will allow you to control how much you rotate the shape.

To start, we want to select polygons. Click on Select Faces in the top panel to switch from selecting lines to selecting polygons.

Click on Marquee tool and select the plant. Polygons you select will be shaded yellow.

Drag the blue curve on the gizmo to rotate the selection.
Now we want to deselect the bottom level of faces. Hover your mouse over the Marquee tool and select Marquee Subtract. Look at the other side of the cactus to make sure you have deselected all faces on the bottom.

Drag the blue curve on the gizmo to rotate the selection again.
Continue deselecting one level of faces at a time and rotating to the very top so a nice twirl is created.
Now we can add a bevel to the edge of the twirl, so it will be nicely defined after smoothing:
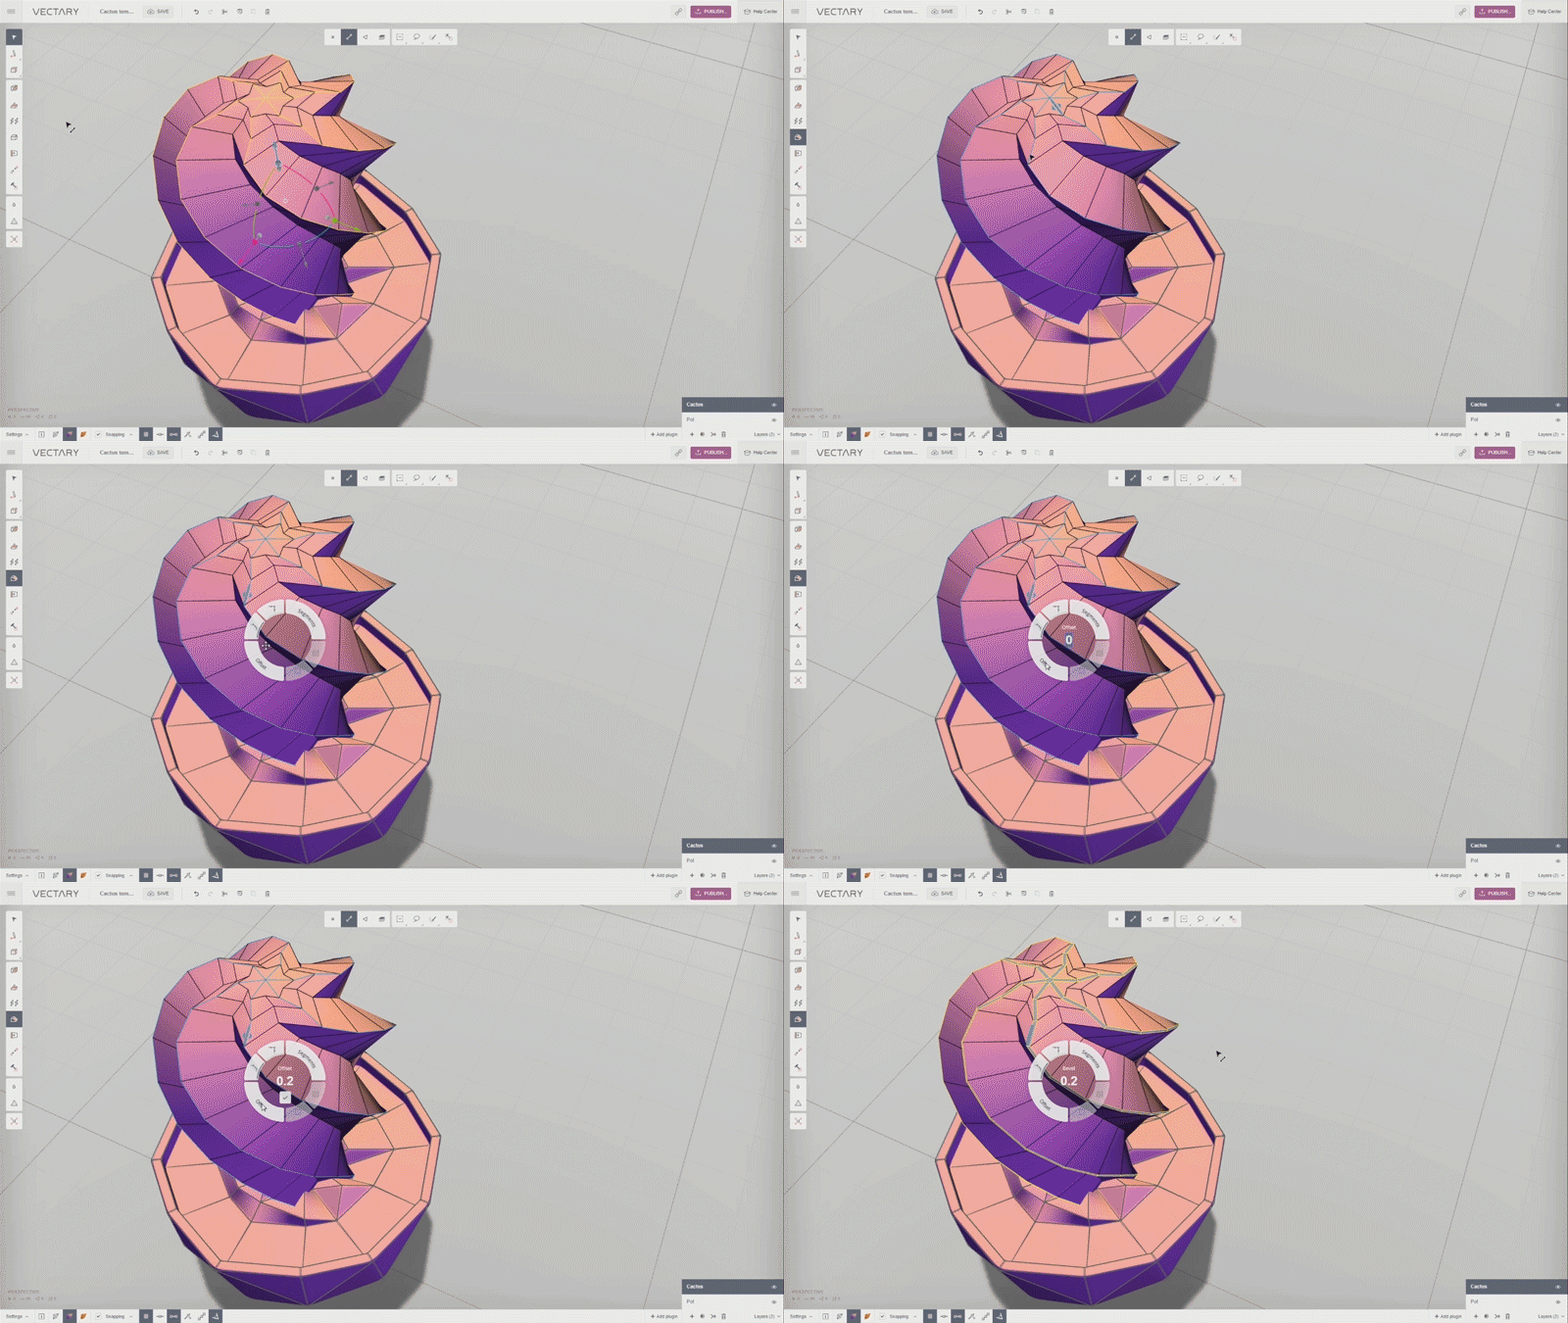
Switch to Select Lines in the top panel. Click on a line on the edge under the top star shape of the cactus. Then double-click the line to bring up the Selection jog and pick Loop Selection to select all vertical lines. You can click and select lines manually, but with Loop Selection it’s much faster. Repeat the action on each hump of the twirl. Finally, manually select all the lines on the top star shape.

Select the Bevel icon, and a blue tool with arrows will appear. You can drag lines to add offset manually, but if you want to be precise it’s better to use dimensions: Click on the handler, then select Offset and type 0.2mm to add thin polygons along the edges.

Click on Smoothing and see how nicely the twirl is defined.

Now let’s order a 3D print of your creation. Go to +Add Plugin and select the Shapeways plugin. Check the geometry, select the material. We recommend White Strong & Flexible, but you can have it 3D printed in Porcelain or other Shapeways materials.
If you don’t want to do all that work, Vectary has also posted the finished model of the spiral cactus. Feel free to customize that and order via Vectary’s Shapeways plugin.
Low Poly Shape
Low poly shapes can be easily created by using basic selection and the Collapse tool. If you want the edges of your shape nicely rounded, don’t forget about Bevel and Smoothing.
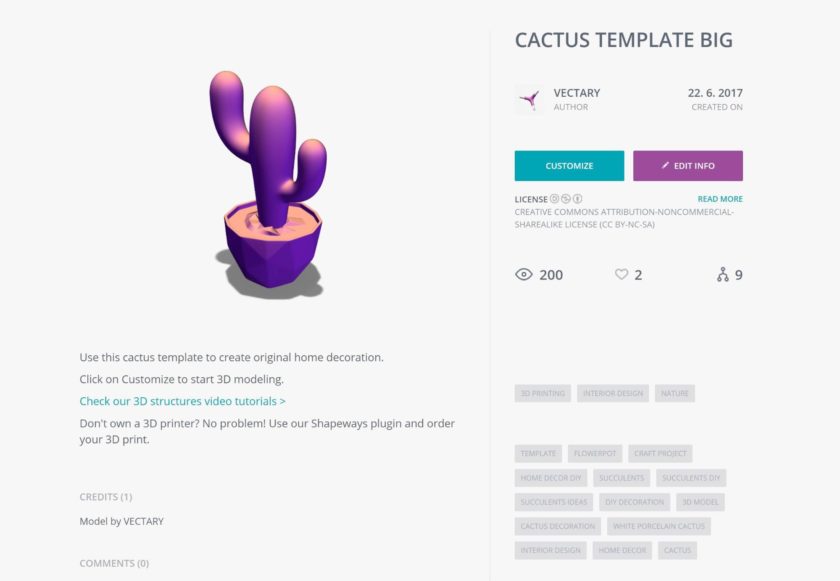
Open this Vectary template of a bigger succulent. Click on Customize button to open the editor.

First, click on Select Lines in the top panel and start selecting lines on the plant. It’s up to you which lines you select, and how many.
In our example, we are selecting every second horizontal line. If you also want to select every second line, choose Loop Selection from the Selection jog in the top panel. Select one line, then hold the Control Key on a PC, or Command on Mac, skip a line and click on the one after (on the same level). Vectary will automatically then select every other horizontal line.

Select Collapse in the left toolbar. Each line will shrink into a single point, creating a crystalline shape.

For smoother edges, click on the Marquee tool, select all lines, and Bevel. Click on the blue tool, then select Offset and type in 0.01mm to add very thin polygons along the edges.

Switch on Smoothing and you’re done.
Go to +Add Plugin and select the Shapeways plugin. Check the geometry, select the material. We recommend White Strong & Flexible, but you can have it 3D printed in Porcelain or other Shapeways materials.
If you don’t want to do all that work, Vectary has also posted a finished model of the low poly cactus. Feel free to customize that and order via Vectary’s Shapeways plugin.
Spiky Shape
Open this Vectary template of a bigger succulent — the same one we used for the low-poly cactus. Click on the Customize button to open the editor.

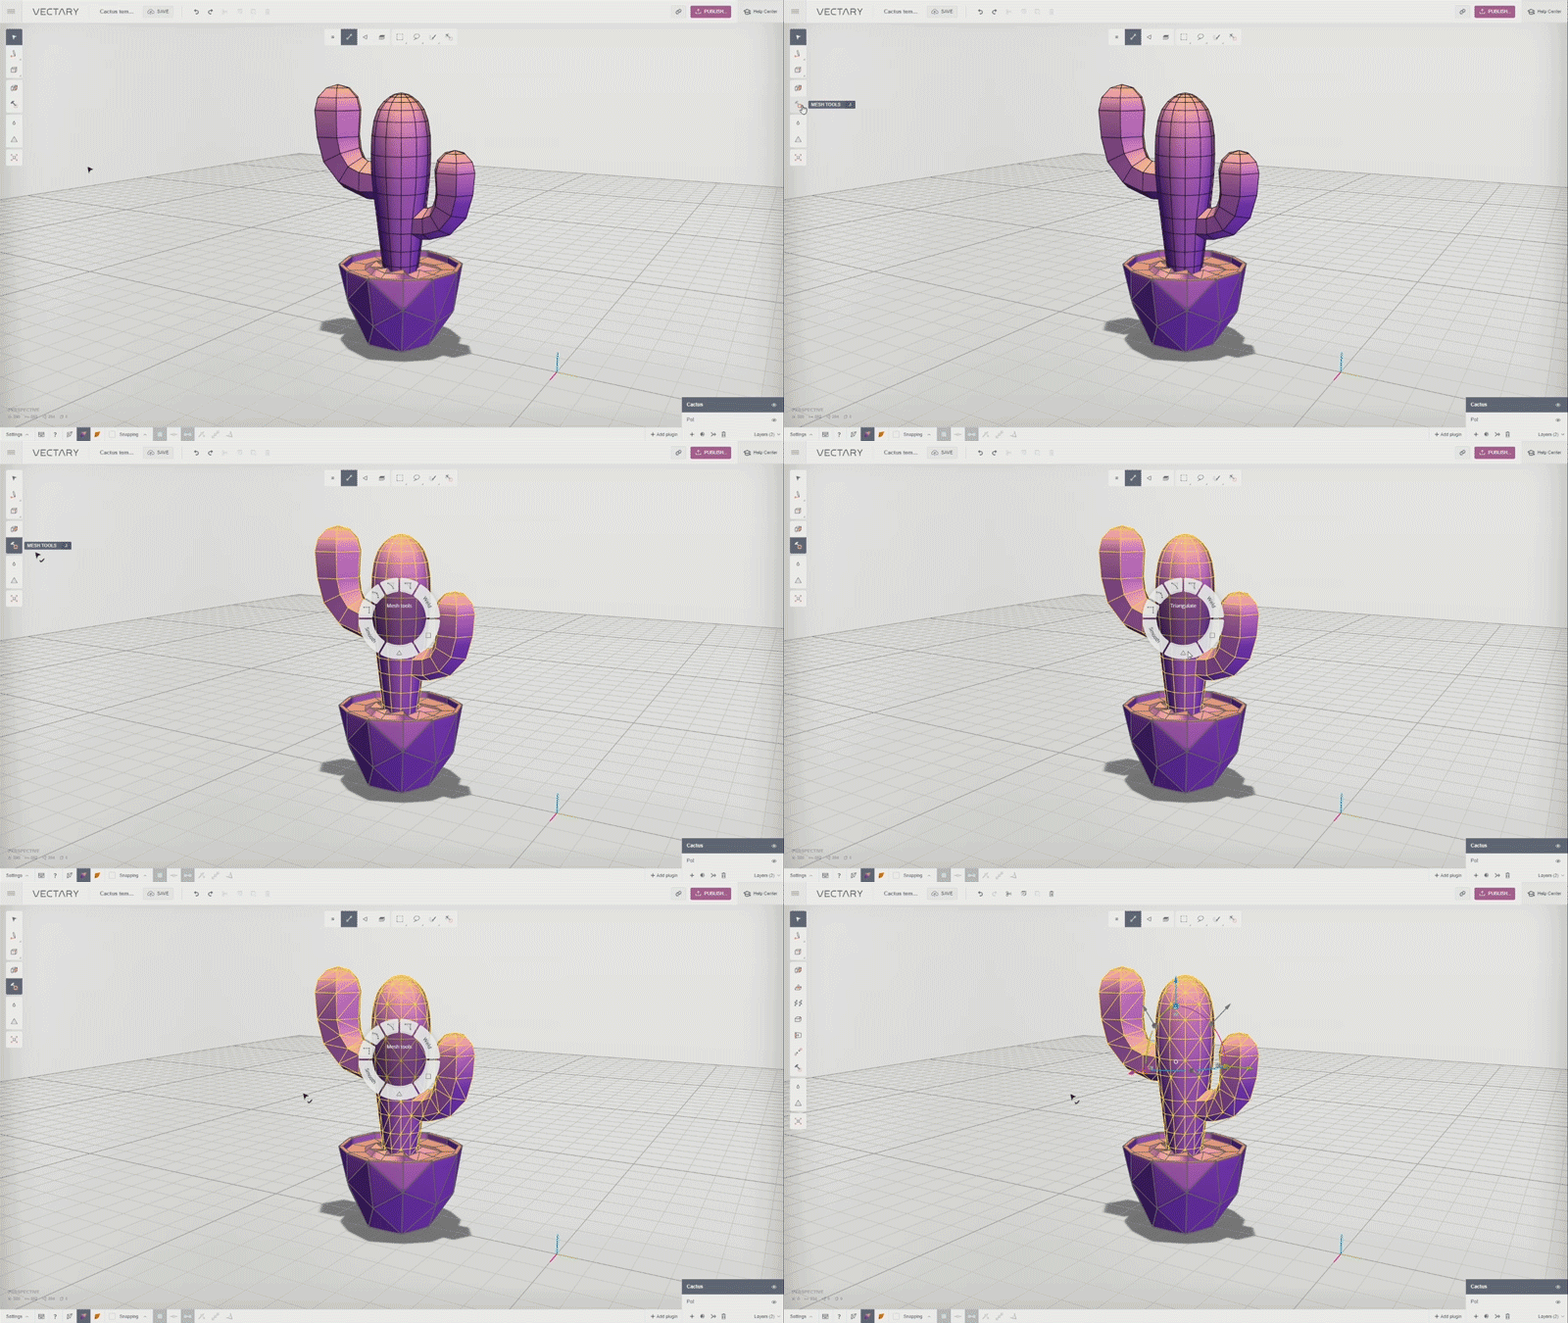
To make a spiky cactus, we want to change the rectangle faces to triangles. Click on Mesh Tools and select Triangulate to transform rectangle faces into triangles.

Click on Select Faces in the top panel.

Now you can add faces in the middle of each triangle polygon. Click on the Bevel tool icon on the left panel. Drag the blue tool to add offset.

Now you can extrude the selected faces. Click on Extrude icon and drag the blue arrow. Finally, click the Collapse tool icon to shrink all the faces into one point and create a spike.

Go to +Add Plugin and select the Shapeways plugin. Check the geometry, select the material. We recommend White Strong & Flexible, but you can have it 3D printed in Porcelain or other Shapeways materials.
If you don’t want to do all that work, Vectary has also posted a finished model of the spiky cactus. Feel free to customize that and order via Vectary’s Shapeways plugin.
Now that you know how to create some basic 3D structures, you can combine them to create your own original shape and apply this principle to anything from jewelry to a vase to your own RC car.
Ready to make your own succulent family? Just click the button below.
A version of this post appeared in Shapeways Magazine in September of 2017.


