Shapeways supports sellers wherever they want to do business. If you would like to sell beyond the Shapeways marketplace and either have a Shopify store or would like to create one, our recent integration with Shopify is a great solution to automating your order processing, production, and shipping by connecting your store with the Shapeways Fulfillment app. No more manual order entry after this integration!
Ready to get started? Follow the steps below to connect your Shopify store to Shapeways.
1. Setting Up Payment
To use the Shapeways Fulfillment app, you must have a credit card on file with Shapeways.
If you have previously placed a Shapeways order with a credit card, your payment method will default to the last credit card you used. If you already have a card on file, skip to Step 2.
If you do not have a credit card on file, you can add one on Shapeways.com.
- Sign in to Shapeways.

- Click the avatar in the top-right corner and select Settings.

- Then select Shipping & Billing.

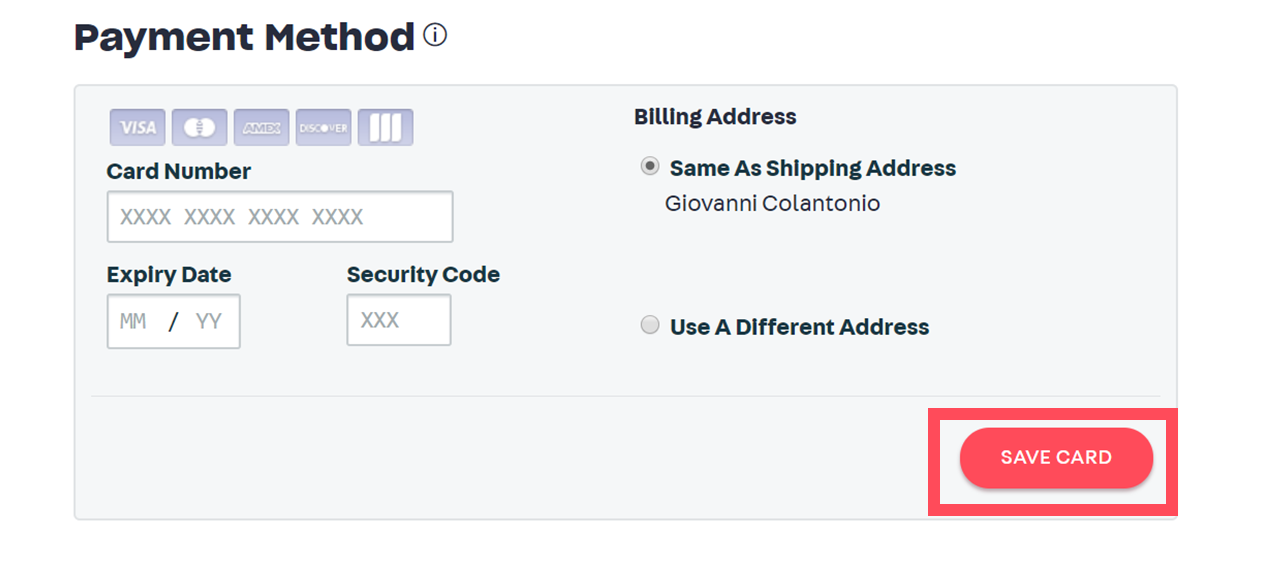
- On the Shipping & Billing page, scroll down to Payment Method. Input your credit card information and billing address then click Save Card.
2. Installing the app
- Go to the “Shapeways Fulfillment” page on the Shopify App Store here.
- Click on the Add App button.
- If you are not already logged in to your Shopify account, you will be prompted to login.
- You will then be prompted to install the app on your Shopify site.

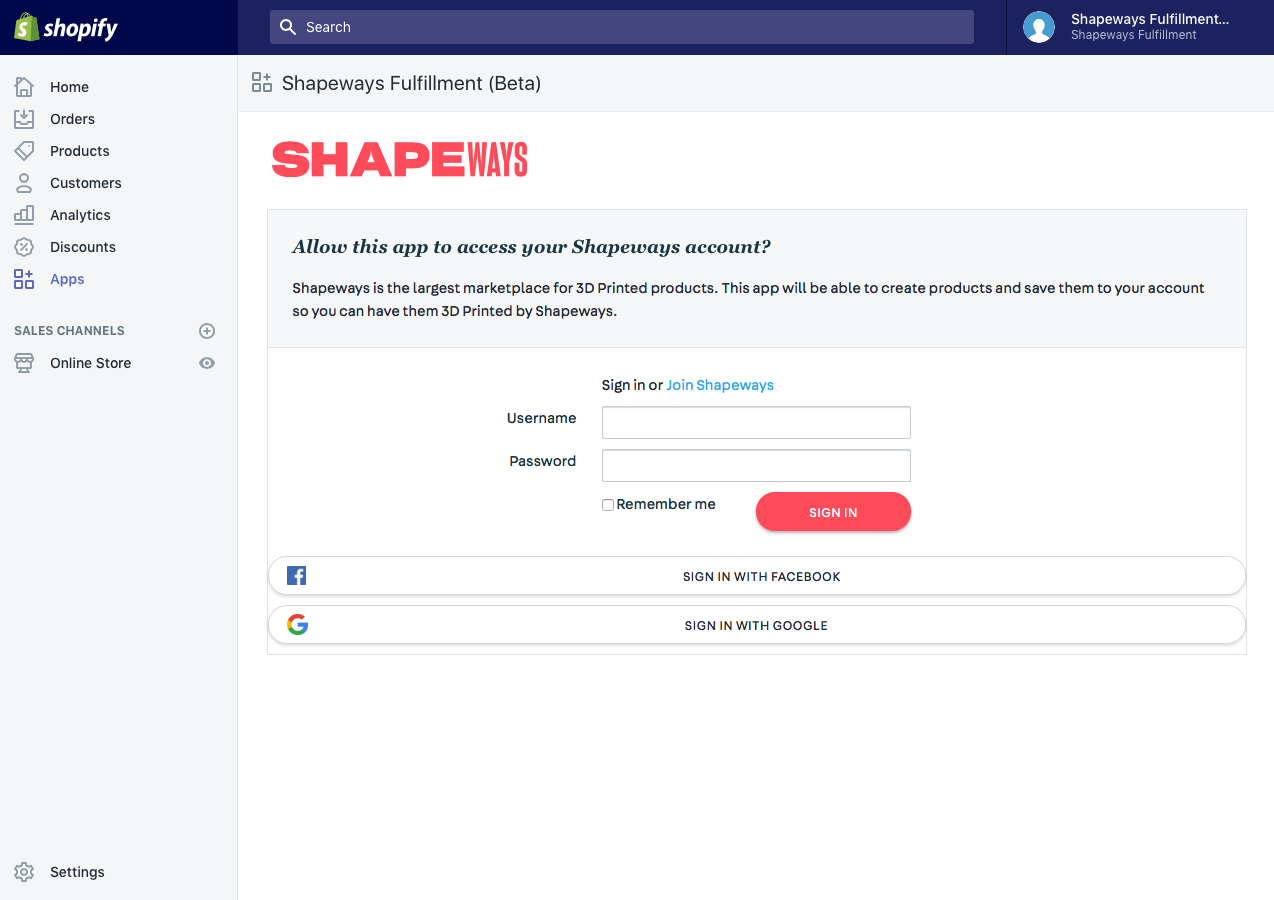
- Next, you will be prompted to sign in to your Shapeways account. Use the same credentials that you use on Shapeways.com.
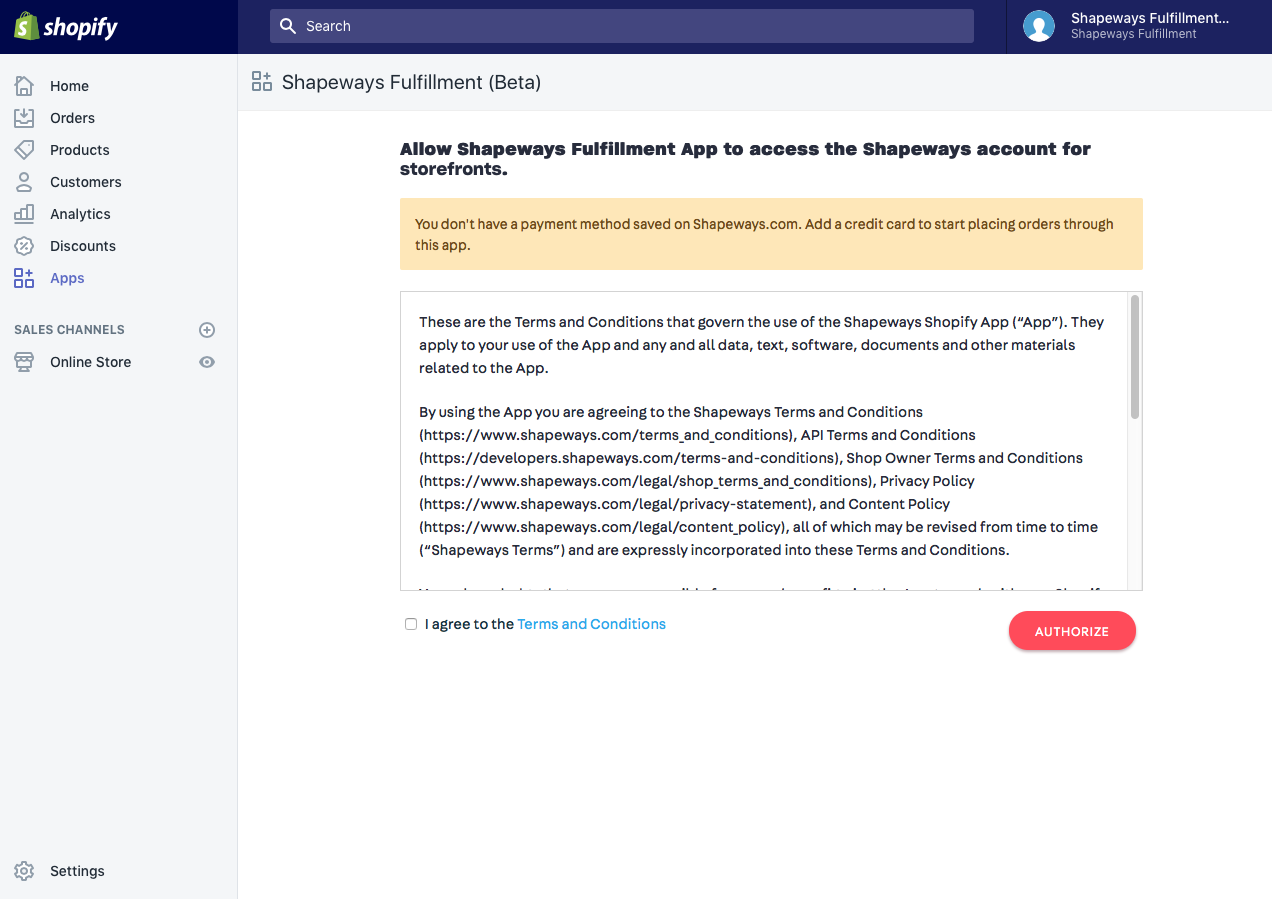
- Review and accept the terms and conditions and click Authorize.
3. Creating Products in Shopify
To start, you’ll need to create your products in Shopify. There are two methods for doing this.
-
Method 1:
Manually create your products in Shopify. For more information on creating products in Shopify, click here to see their guide.

-
Method 2:
If you have a Shapeways Store and you’d like to import all of your Shapeways products, the Shapeways team can provide you with a Shopify Product Import CSV file that can be used to import your public products into Shopify. Email [email protected] for details.
4. Mapping Shapeways Products
You can now manually map your Shapeways models to your Shopify products in the Shapeways Fulfillment App. To do this, you’ll need to enter the Shapeways model ID and select a material for each Shopify product variant. There are two ways to locate the information needed.
-
Method 1:
If you have a Shapeways shop, sign to Shapeways.com and go to your Shop Settings.
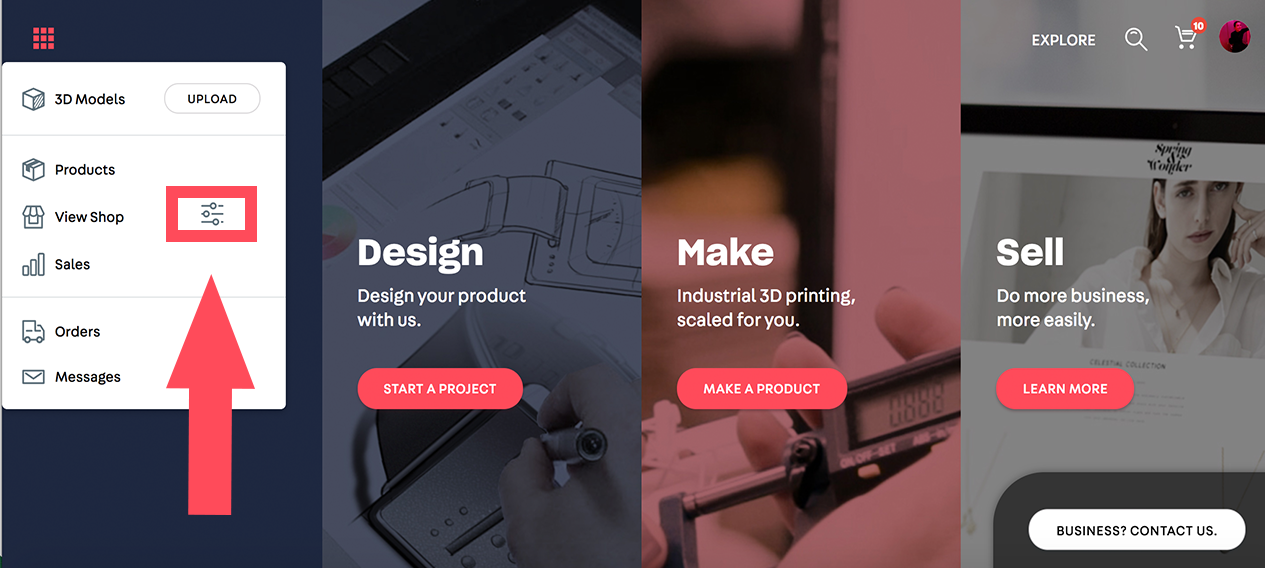
- Select Pricing CSV Wizard.

- Click Download CSV. Your model IDs will be displayed in this file.

-
Method 2:
If you don’t have a Shapeways Shop: click on the 3D Models tab. Here, you’ll find a list of your uploaded models. Click on a model and copy the number at the end of the browser’s page URL. This is the model ID for your product. (Example: for https://www.shapeways.com/model/upload-and-buy/1234567, copy “1234567”)

- Then, you can map your Shopify products to your Shapeways models and materials. Go to the Shapeways Fulfillment app and click on the Products tab.

- Here, all of your Shopify products and variants will be automatically populated in the first column.

- For each product-variant, enter the ID of the Shapeways model and select the material you want it to print in.

- If you select multiple product-variants, the bulk edit tool will appear at the top. You can use this to map several product-variants at once.
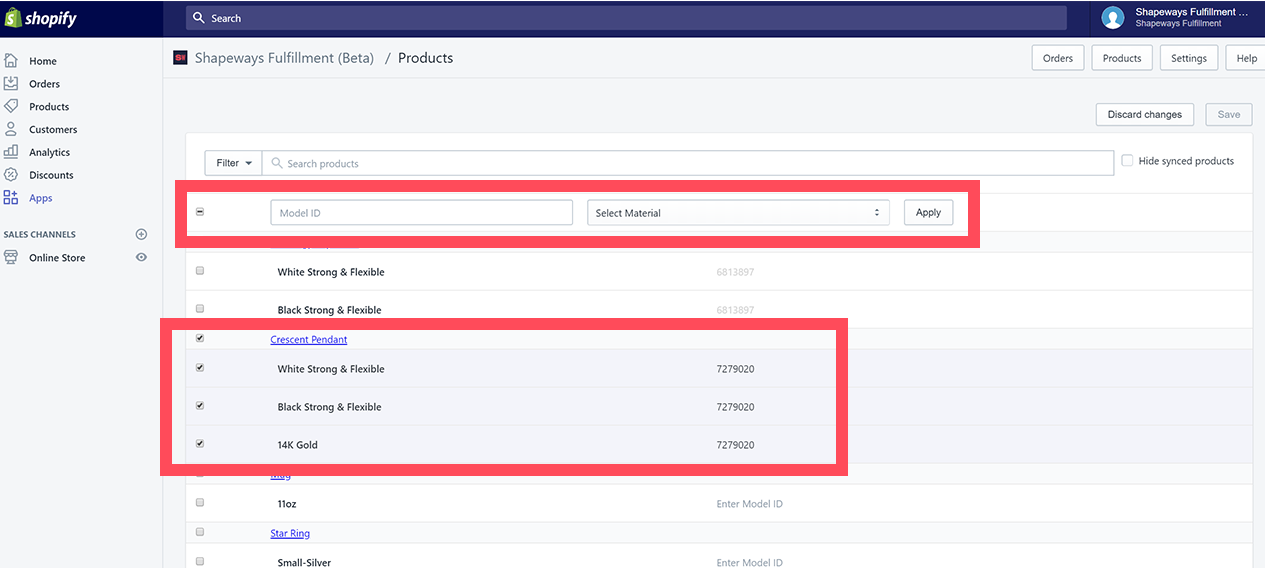
- If you have a product-variant that is not manufactured by Shapeways, simply leave it blank.
- When you have finished mapping all of your products, click Save.

5. Configuring Settings
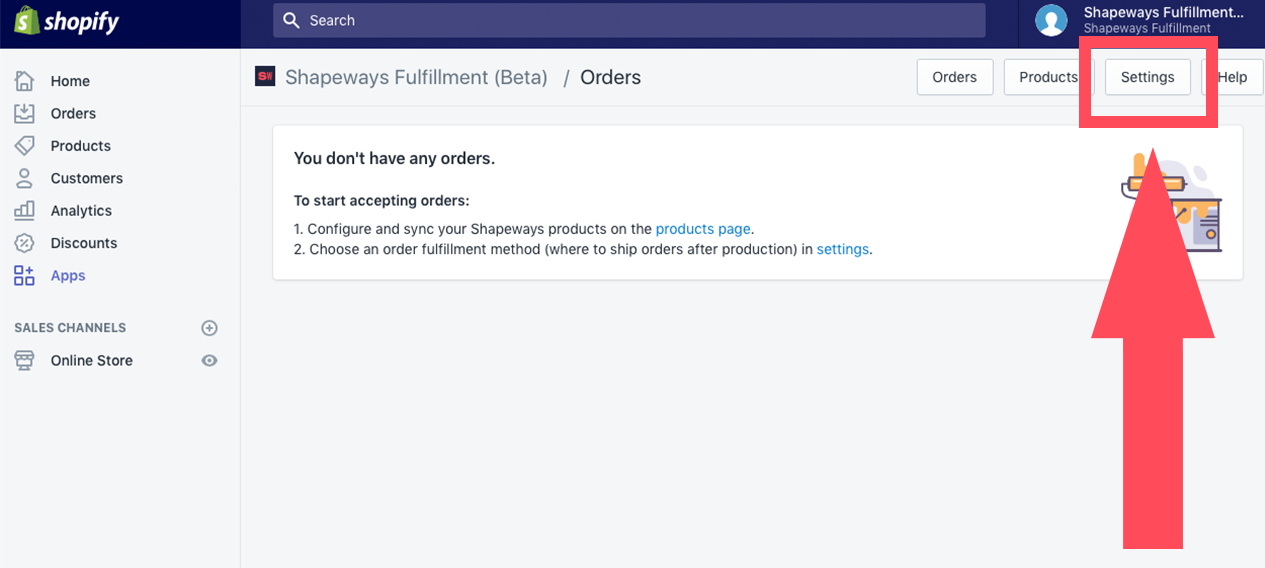
You can access your app setting by clicking on the Settings tab.
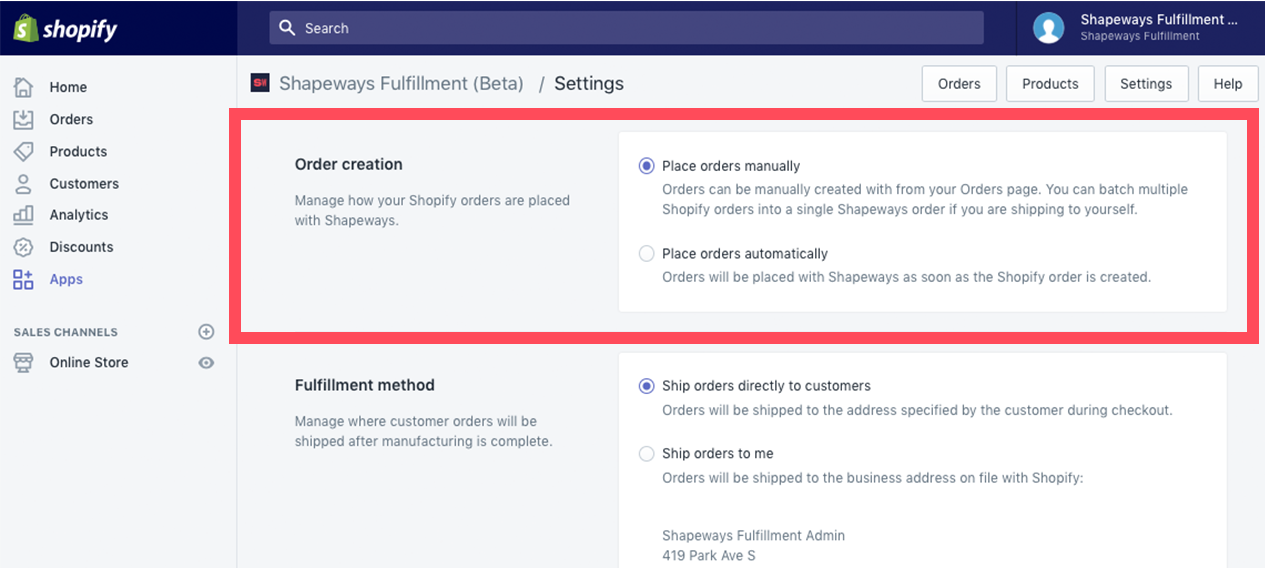
Decide how you want your Shapeways orders to be created.
- Place orders manually means that you will need to create each order. This gives you the ability to decide which Shopify orders need to be fulfilled by Shapeways and when the order is placed.
- Place orders automatically means that for every Shopify order you receive, a corresponding Shapeways order will automatically be created.
Decide how you want your orders to be fulfilled by Shapeways.
- Ship orders directly to customers means that Shapeways will ship the order to the customer who purchased it on your Shopify site. If this setting is selected, the order will be shipped to the address the customer provided while checking out on Shopify.
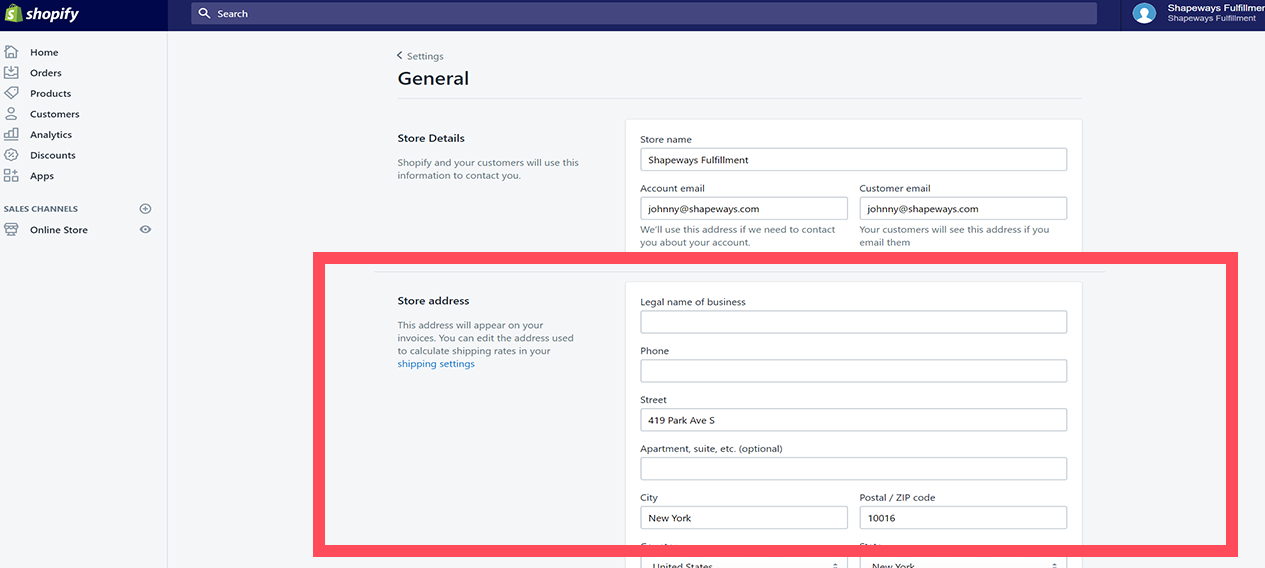
- Ship orders to me means that Shapeways will send all orders to you first. This will allow you to complete any assembly, finishing, or packaging that is required before sending it to your customer. If this setting is selected, Shapeways will send it to the Store Address in your Shopify settings.
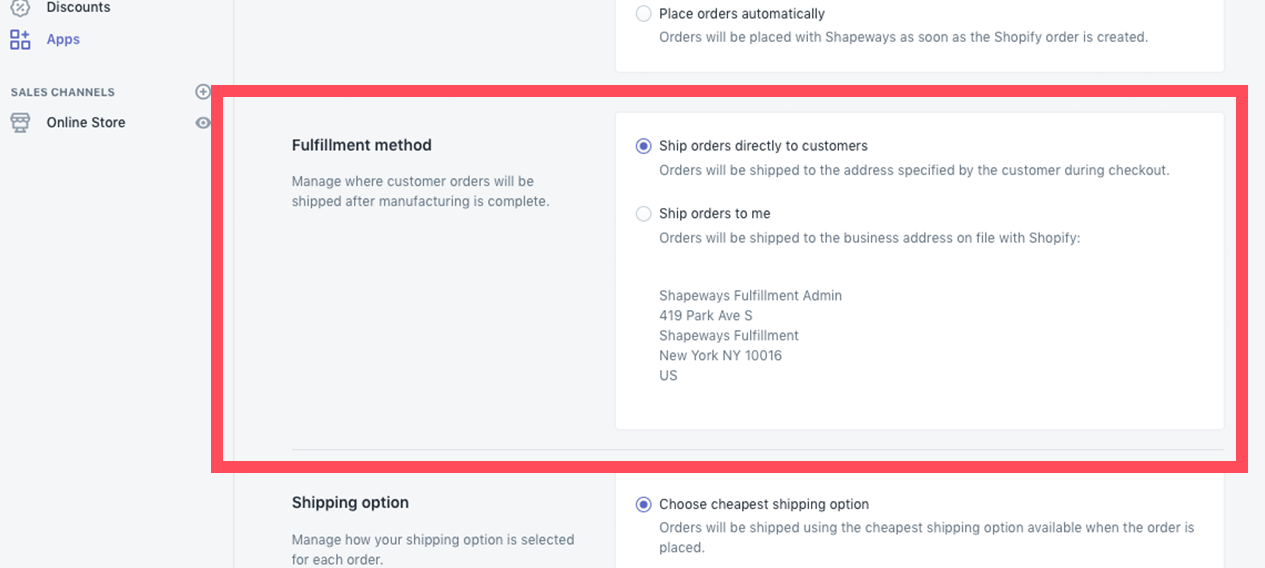
- To update the Store Address, go to your Shopify Settings and select General.
Decide how you want your orders to be shipped by Shapeways.
- Choose cheapest shipping option means that every time a Shapeways order is placed, it will default to the cheapest shipping option.
- Choose fastest shipping option means that every time a Shapeways order is placed, it will default to the shipping option with the shortest delivery time. If several options have the shortest delivery time, it will default to the cheaper option.
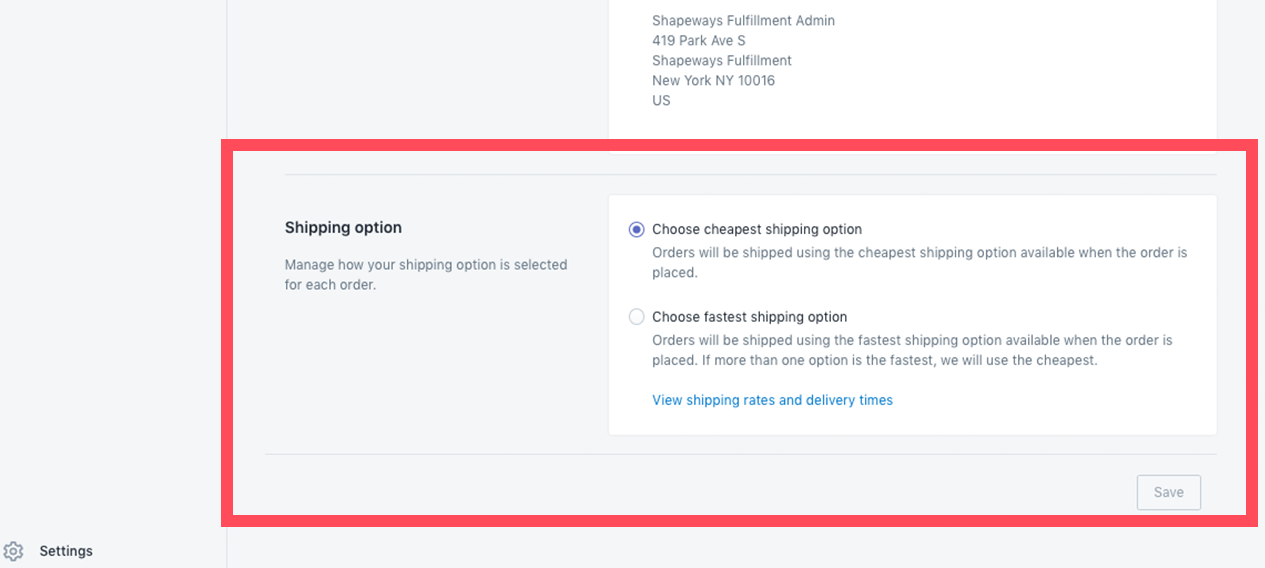
- You can view the shipping rates and delivery times on Shapeways.com. The address used for calculating the shipping rate is determined by the Fulfillment Method setting.
Getting Help from Shapeways
The Shapeways team is here to assist at any stage during the setup. For help, just email [email protected].


